Can I collapse bullet points and headings?
Yes. Harbor calls them collapsible outlines, and if you’ve folded an outline in Evernote, Notion, Workflowy or Roam, this is the same idea: hide a section you’re not working on so the rest of a long note fits on one screen.
How to fold something
Move your pointer over a bullet or a heading. If it has anything underneath it, a small arrow appears just to its left. Click the arrow.
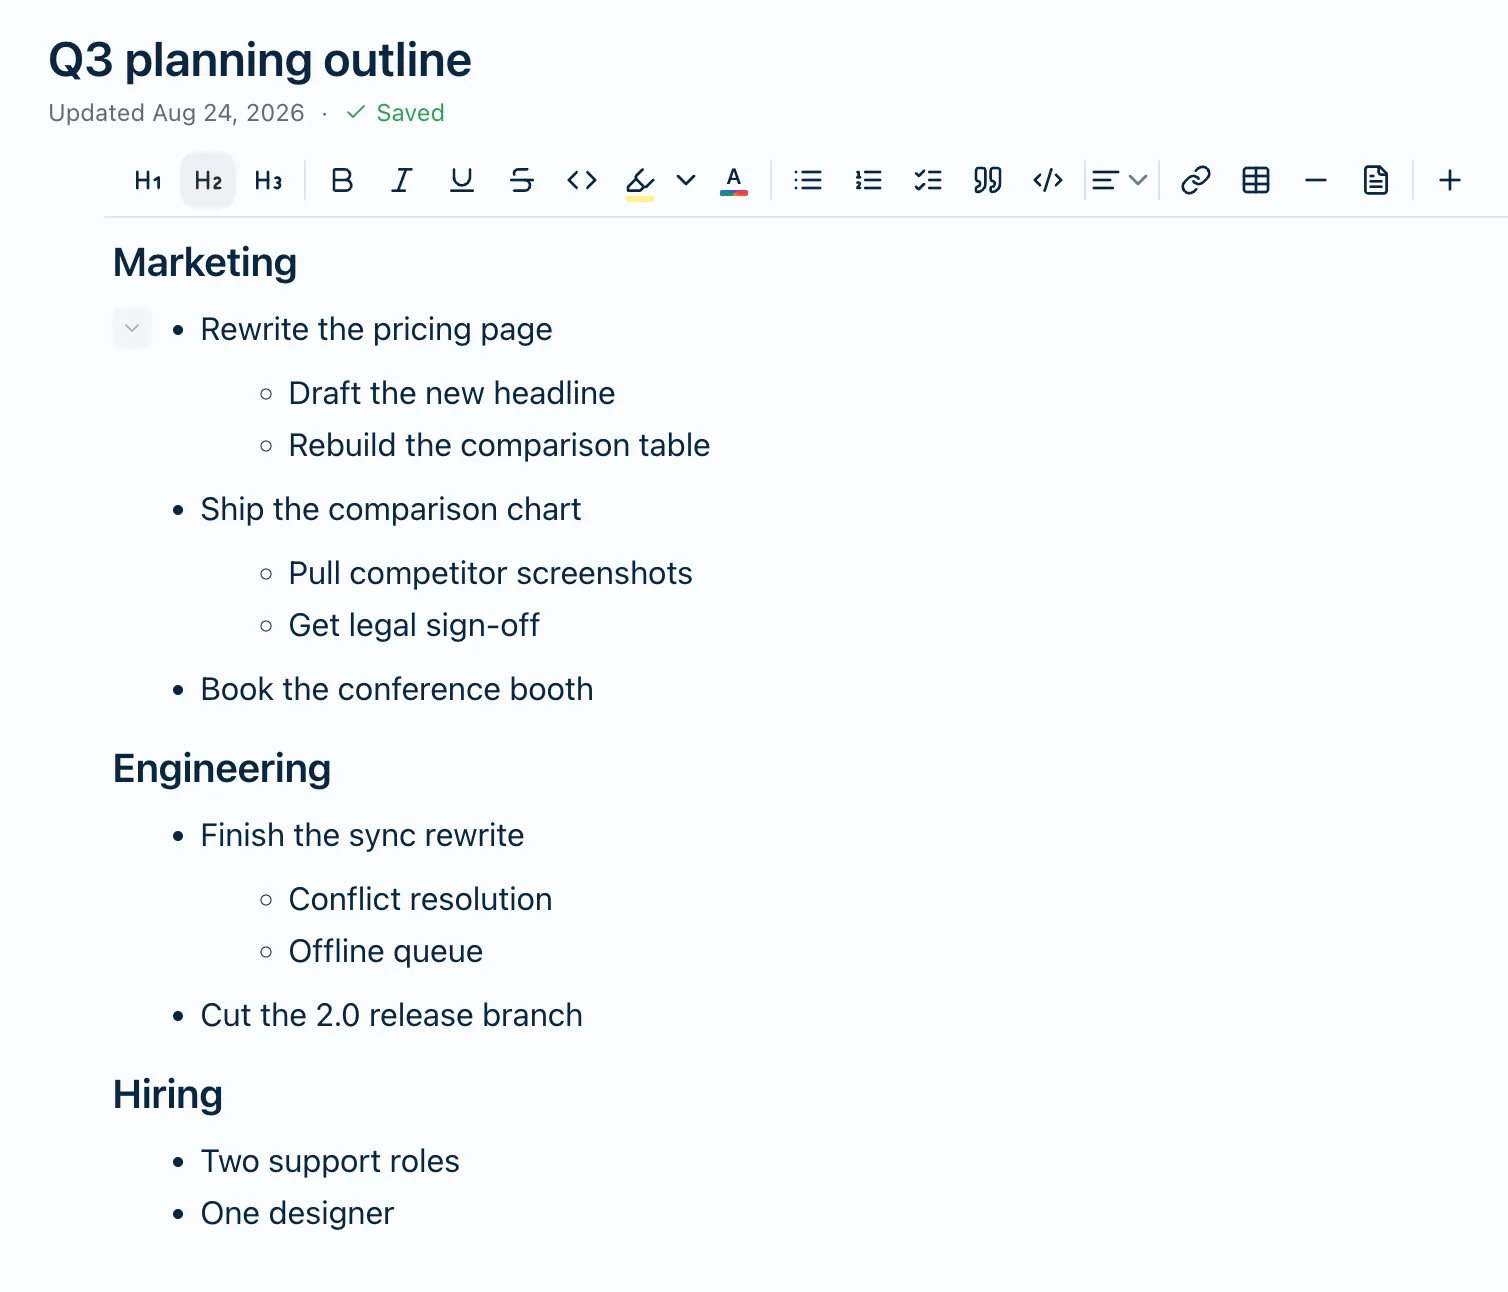
Everything nested under that row disappears, and the arrow turns to point sideways:
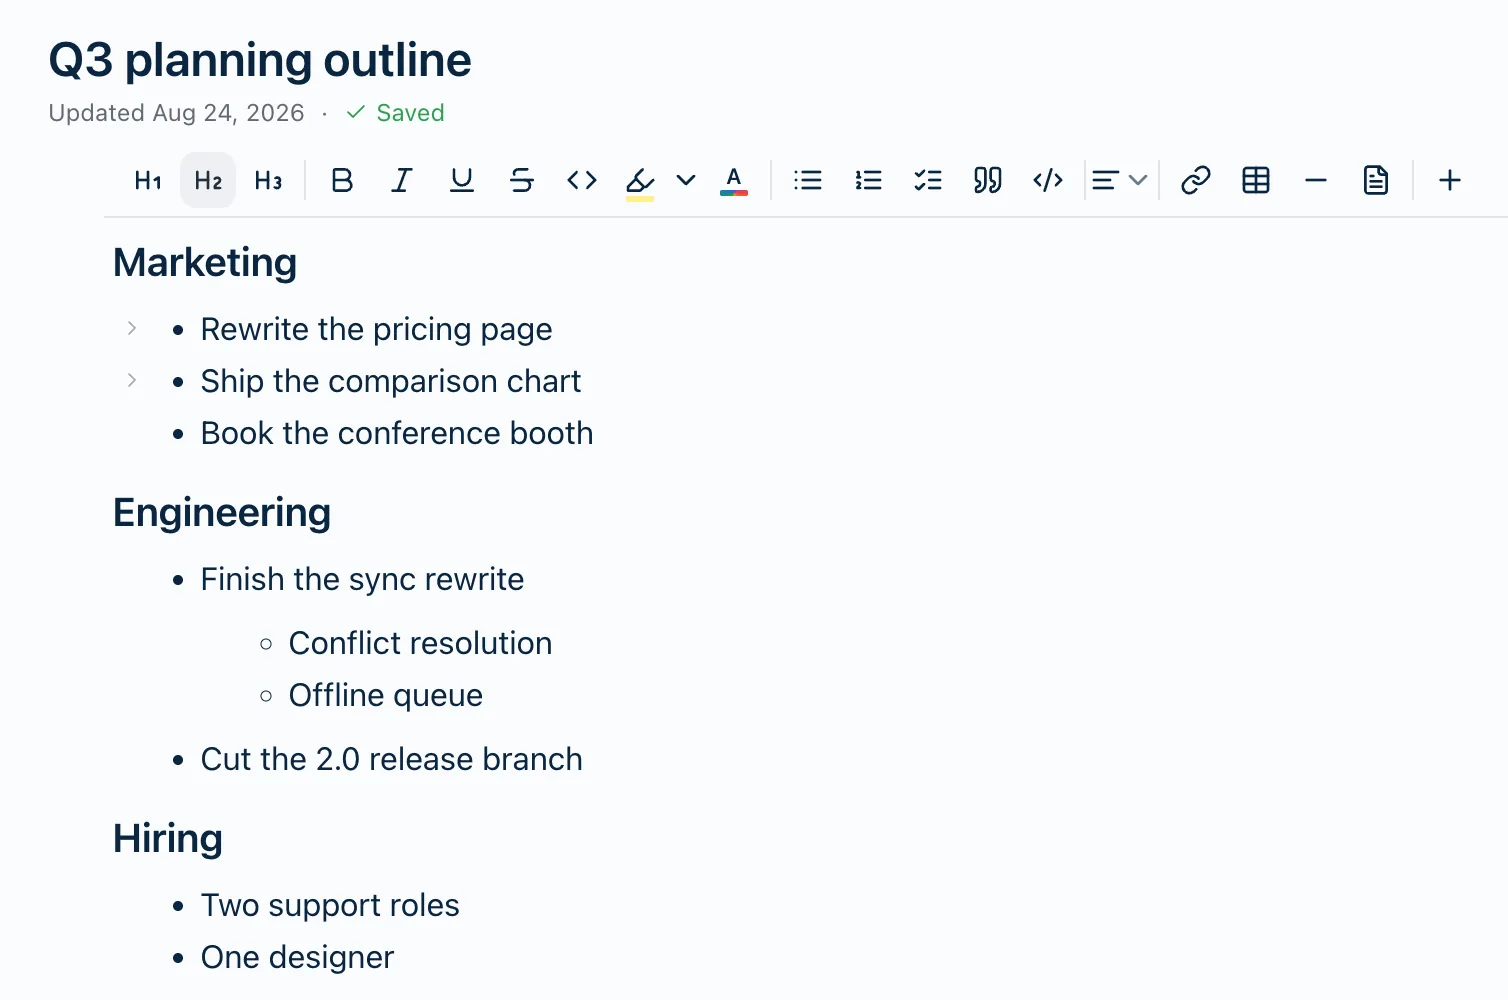
Click the arrow again to bring it back.
Bullets, numbered lists and checklists all fold the same way.
Folding a heading hides its whole section
A heading doesn’t contain anything the way a bullet does — the paragraphs, lists and tables under it are just what comes next. Fold it anyway and Harbor hides all of that, right up to the next heading of the same level or higher.
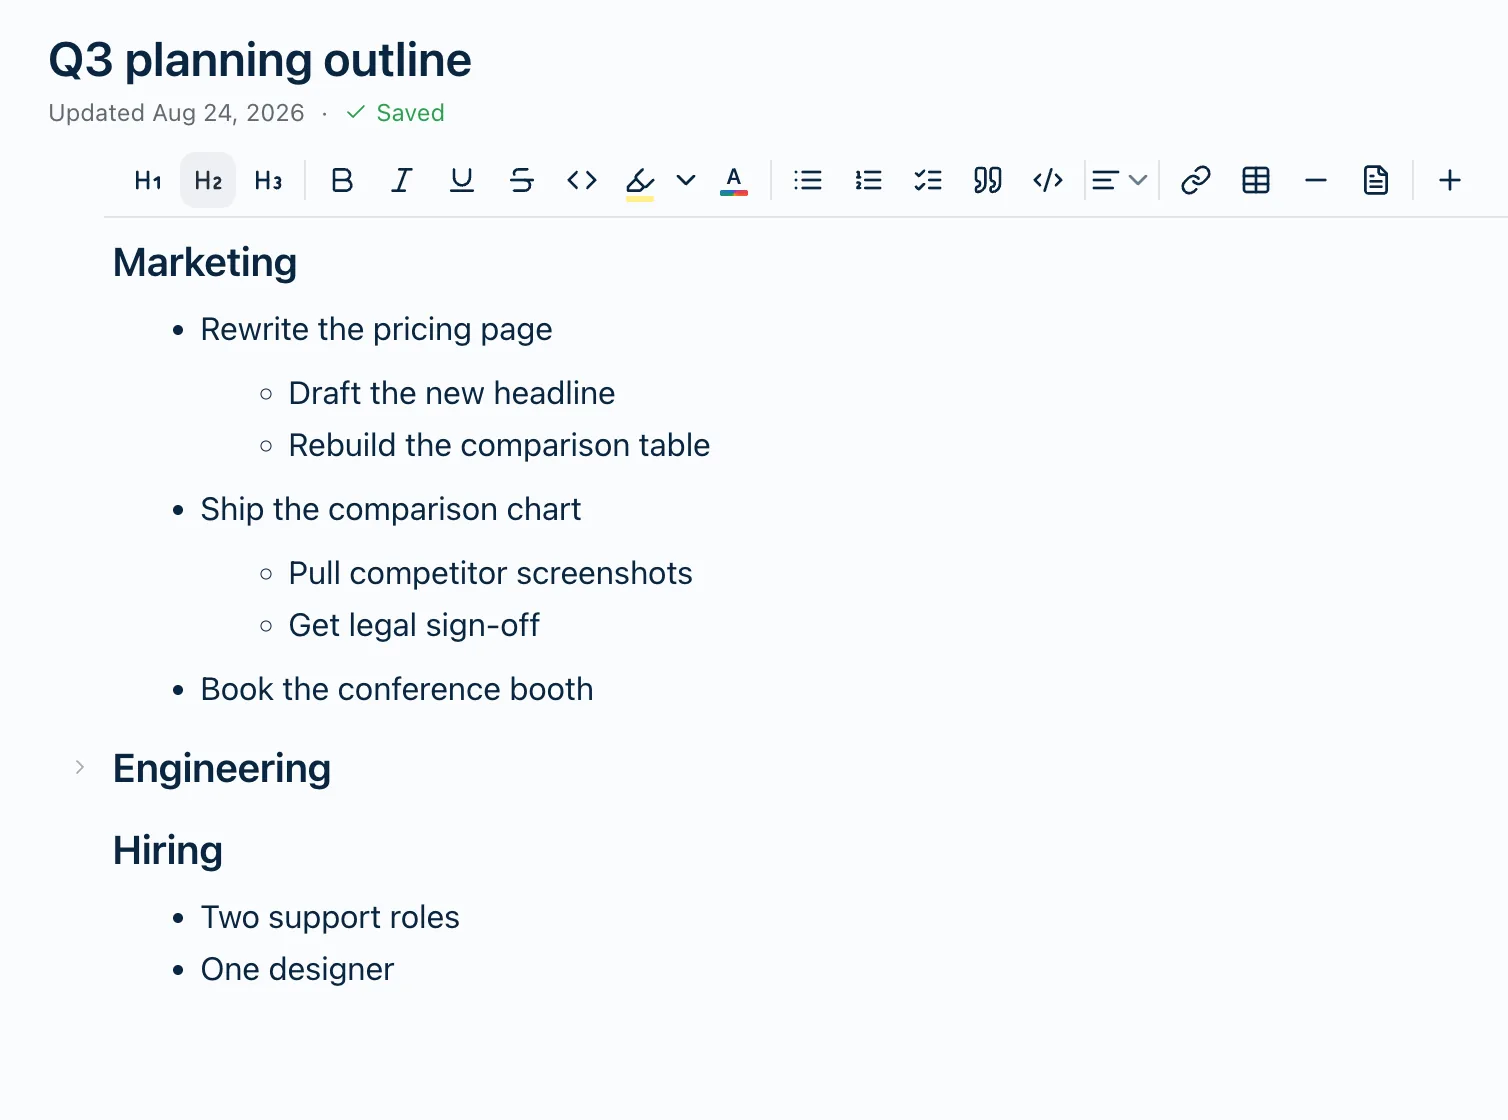
That’s the one to reach for on a long note. Fold every section but the one you’re writing in, and a note you’d normally scroll through becomes a table of contents you can open a piece at a time.
Finding a folded section again
A collapsed row keeps its arrow on screen. An expanded row only shows its arrow when you’re pointing at it, so an outline at rest stays clean — but a folded one keeps a sideways arrow beside it whether you’re hovering or not. That’s the difference between a bullet that’s hiding something and a bullet that never had anything under it.
On a long note, skip the hunting. The Headings list in Note info shows every heading in the note, folded or not, and clicking one opens whatever folds are in the way. Here’s how to jump to a heading.
The keyboard shortcuts
Put your cursor anywhere in a row and:
- ⌘⇧[ collapses it — Ctrl+Shift+[ on Windows.
- ⌘⇧] expands it — Ctrl+Shift+].
They act on the row the cursor is in, so from a nested bullet you fold that bullet, not the one above it.
Folds follow you between devices
Fold a section on your Mac and it’s folded when you open the note on your iPhone. A fold isn’t a per-device display setting you have to keep in step — it’s part of the note, saved and synced the same way your words are. Undo works on it too.
Search still finds what’s folded
Folding hides text from your eyes, not from Harbor. Everything inside a collapsed section stays searchable, so a search across your notes turns up a note whose match is tucked inside a fold.
To see the match itself, open the note and use find-in-note — ⌘F, or Ctrl+F on Windows. When it jumps to a hit inside a folded section, Harbor opens the fold for you rather than scrolling to something you can’t see.
What other people get
- A share link keeps your folds. Publish a note as a public link and the person you sent it to sees the same folded sections you did — and can click them open to read the rest. It’s a live page, so it behaves like one.
- A downloaded file comes out fully expanded. A PDF, Markdown, HTML or Evernote export has no arrow to click, so a folded section in a file would just be missing content. Harbor writes the whole note instead.
Moving a folded section
Drag a collapsed row and everything it’s hiding goes with it. That’s the quick way to reorder a long note: fold your sections down to their headings, drag them into the order you want, then open them back up.
What doesn’t fold
So you’re not hunting for an arrow that isn’t there:
- Rows with nothing under them. A bullet with no sub-bullets and a heading with no section aren’t foldable — there’s nothing to hide.
- Extra-small headings, and anything smaller. Large, medium and small headings fold. An extra-small one doesn’t, and neither does a deeper heading from an imported or pasted note.
- There’s no “collapse everything” yet. Folding is one row at a time for now.
Where it works
Collapsible outlines are in web, Mac, iPhone, iPad, Windows, and Android — every Harbor app with an editor.
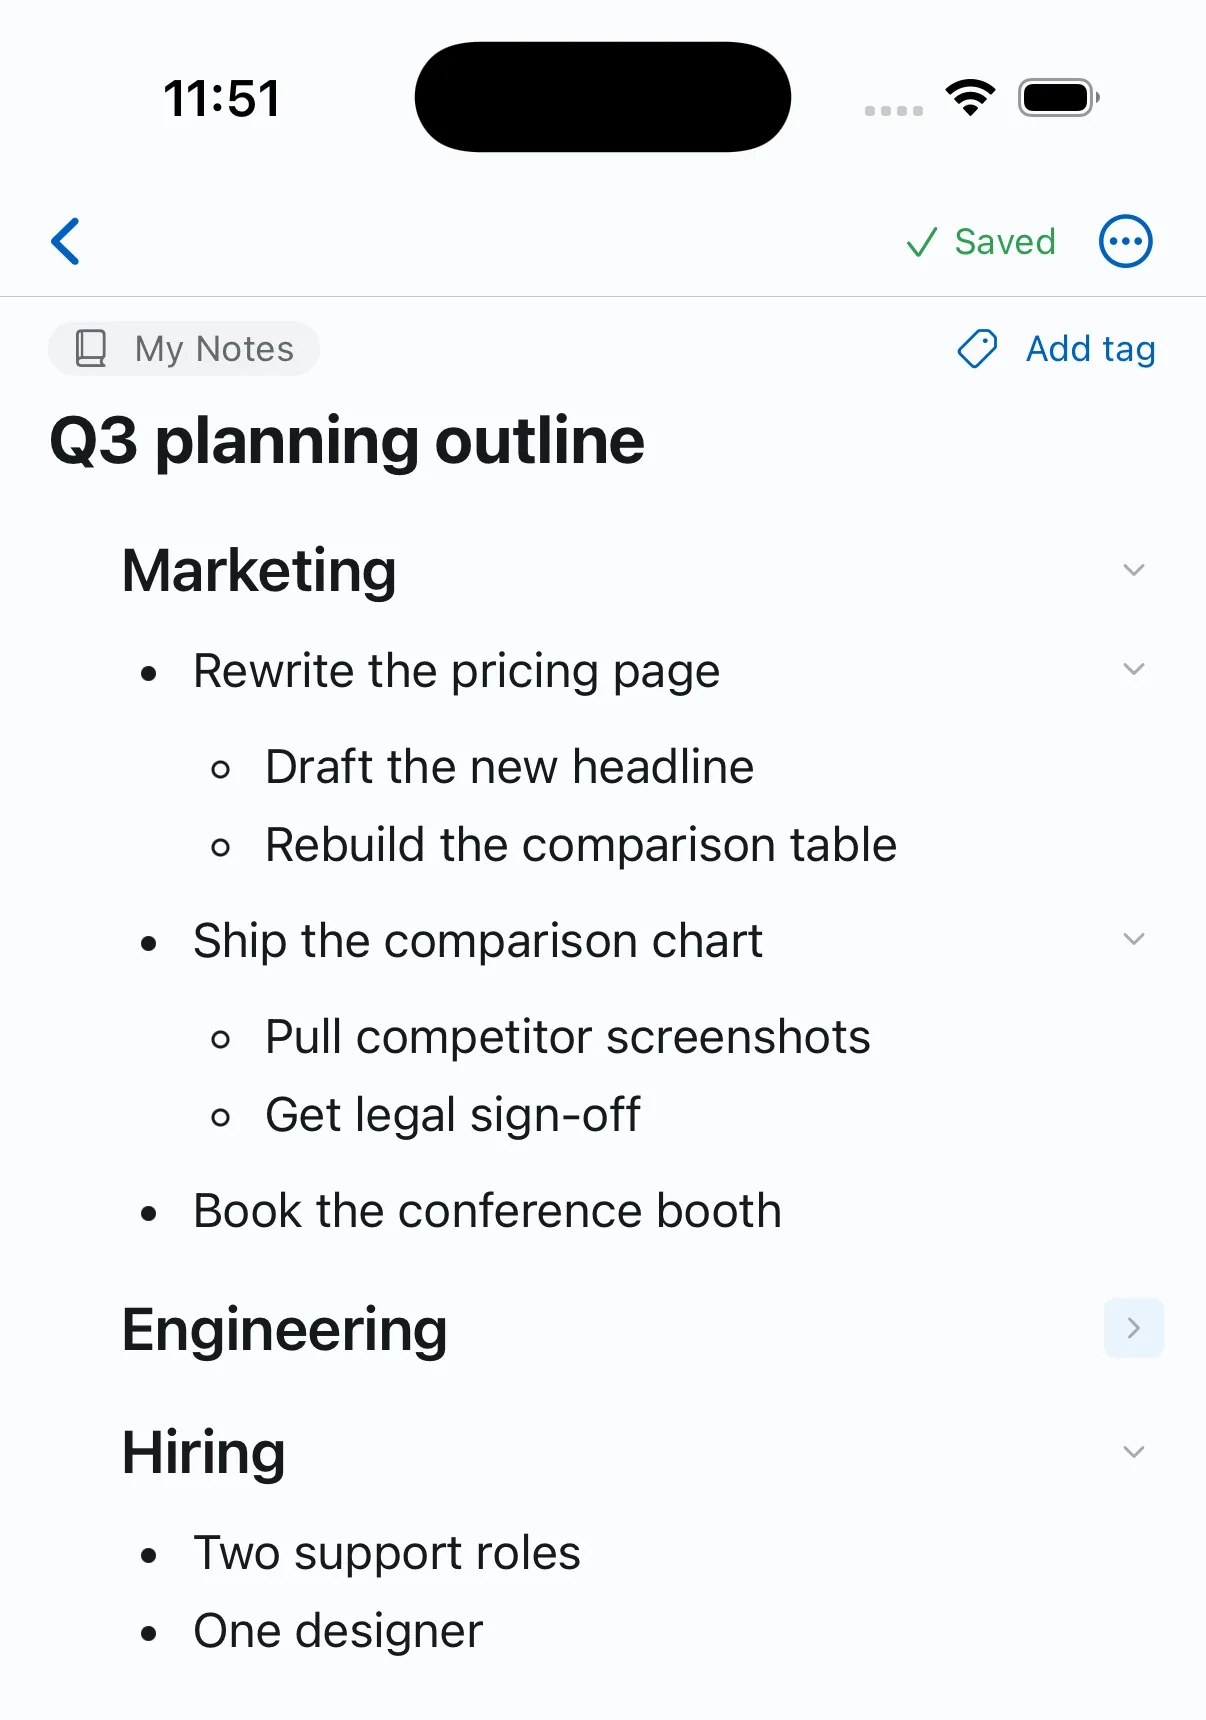
One difference worth knowing on a phone or tablet: there’s no pointer to hover, so the arrow sits at the right-hand edge of the row instead of the left, and every foldable row shows one all the time. Tap it to fold and tap it again to open.
Guide lines for nested lists
Four levels into an outline, it’s hard to tell which item a row sits under. The Show list guide lines setting fixes that, and it does what its description says: Draw a faint line beside nested list items, so you can see which item they belong to.
A line runs down from each bullet, number or checkbox that has something nested under it, one line per level. It only adds lines. Nothing in your note moves.
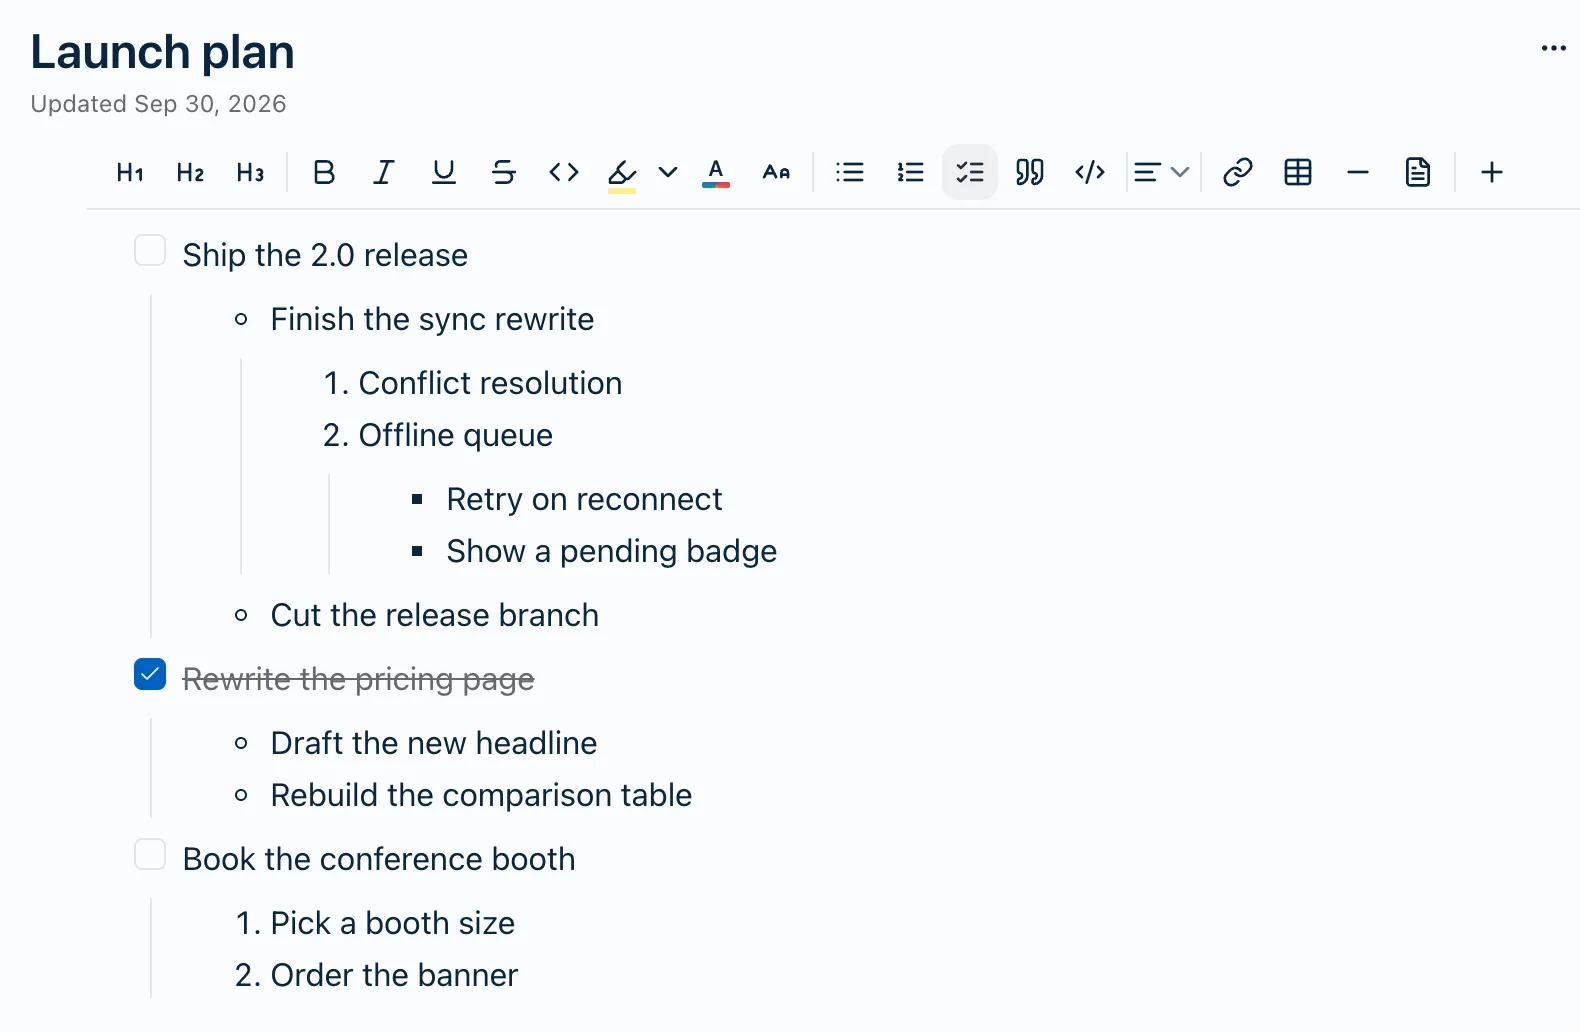
It’s off until you turn it on. Turn it on and the note you have open picks it up straight away. The setting is saved to your account, so your other devices get it too.
- Web, Mac and Windows — Settings → Preferences → Editor, right under Show word count.
- iPhone and iPad — Settings → Editor. On iPhone, Settings is on the More tab.
- Android — the More tab, then Settings → Editor.
- CLI —
harbor settings set --editor-show-list-guides. Add=falseto turn it off.
Folding works the same with the lines on. Fold an item and its line goes away with its children.
The lines are only for you, in your own editor. They never show on a public share link, in version history, or in an export.
Related questions
Need more help?
Still stuck? Send us a message and a real person will get back to you.